Your Cart is Empty
$25 OFF ORDERS OF $250 OR MORE -- CODE: 25OFF
$25 OFF ORDERS OF $250 OR MORE -- CODE: 25OFF
$25 OFF ORDERS OF $250 OR MORE -- CODE: 25OFF
3 min read
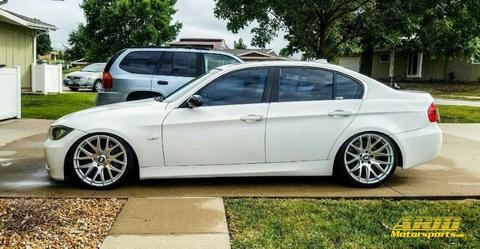
Thanks to our customer Stephen G. who submitted this review and installation guide for the ARM 5" FMIC and N54 Charge Pipe on his E90 335xi. In this Tech Post you'll see the unboxing of the intercooler and charge pipe, all the way to the finished products installed on his car and independent performance results. For more details about the Intercooler and charge pipe for your 135i or 335i click the links below.
CLICK HERE for ARM 5" FMIC Details
CLICK HERE for ARM N54 Charge Pipe Details
Without further ado ...
I've been in need of an intercooler and cp/bov set up for a while in order to achieve fbo and this bundle deal from Arm I couldn't pass up for the price so I figured I'd give it a shot and a review for anyone else looking at these products as well.
08 335xi AT with alpina flash
-3 inch catless downpipes
-ARM 5inch Stepped fmic
-ARM Cp/bov
-Dci
-Stage 1 fuel it e60 mix
-Custom exhuast
-Mhd flash only

Shipping was very fast, I received both items in 3 days. They were also packaged very well with everything you need included (one thing I did need to get were washers for the screws provided with the IC).


In the Intercooler box was the unit itself along with 2 mounting screws.
The charge pipe box had the pipe itself
-O ring for the throttle body connection
-Silicone coupler for the chargepipe to
lower charge pipe connection
-4 clamps
-2 DV caps for the inlets
-Screws with washers for the tmap connection
Intercooler installation took me 30mins max. It was very straight forward and sits right in the stock location. Fitment was great, I didn't have to use much force to "make it fit" It connected right to the stock locations and was secured using the stock c clamp connections and screws.
Remove Belly Tray

Remove 2 torx screws

Unlock 4 plastic swivel connectors

Remove C rings from IC

Intercooler should slide out now, repeat steps in reverse but use the longer screws provided with the IC.

For the charge pipe It uses a tial 50mm flange, I tapped into my intake and used a 1/4 fitting and 1/4 hose so the bov would get the correct vacuum along with a 11psi spring and it works great. For install you have to remove your intakes or airbox, tmap sensor, as well as the stock dvs. From there it's pretty straight forward just remember to put the tmap in the new charge pipe or else your car wont boost. Fitment was great, one thing to note is there is very minor wiggle room at the throttle body. I checked for boost leaks afterwards and I'm still hitting target so everything works how it should. Apparently it is a common problem with the aluminum cps.


Lastly I have data logs and 2 virtual dyno runs, these logs and dyno runs were recorded on the same exact day before/after install on the same tank of gas on mhd v7.1 e60 flash. The after logs it was a few degrees warmer outside. It was 71 degrees outside and The IATs stay 10-15 degrees above ambient rather than stock which was 20-25ish above ambient just cruising.
First I have two 3rd gear pulls from 2k~ - redline to show IATs,
First is stock second is arm intercooler.
Stock starts at 97 and ends at 129
ARM starts at 82 and ends at 95, cooler than what stock even started at.

And here's a log of the IATs of the ARM intercooler of a bottom of 3rd to top of 4th gear pull, 82-106 IAT

This virtual dyno run as well, again, same day same weather same tank of gas and this was on the same strip of road, they're website says up to 25hp/27tq gains. I see gains of 25hp/14tq and I definitely feel it. The car pulls a lot harder now and stays pulling since I'm not seeing 170+ IATs anymore.
Overall I'm very pleased, can't beat the bundle priced.

For more information or questions please contact us at getarmed@armmotorsports.com
| Item | Price | Qty | Total | |
|---|---|---|---|---|
| Subtotal |
$0.00 |
|||
| Shipping | ||||
| Total | ||||
